
 |
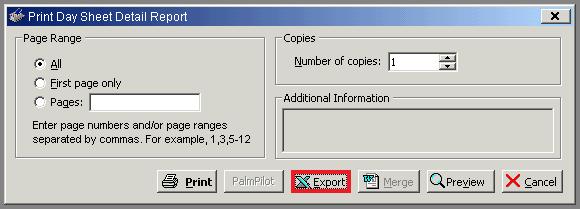
Step 1 Click Export |
 |
Step 2 Type the path in the File Name box - \\client\C$ |
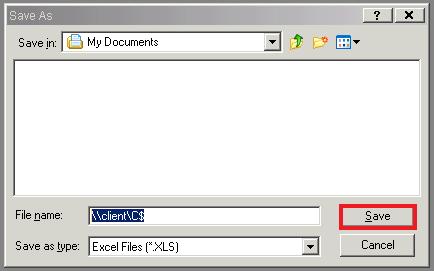 |
Step 3 Click save. This will take you to the local c:\ drive where you will be saving your export. |
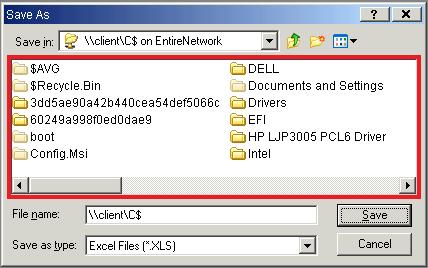 |
Step 4 You can either save your document some where here or go to the next step and learn how to create an exports folder. If you do not want to create an exports folder, please skip to step 8. |
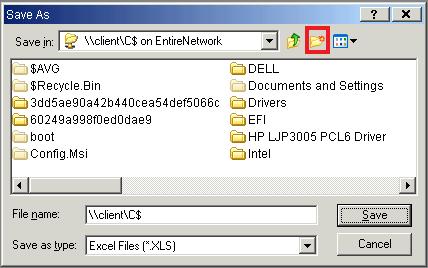 |
Step 5 Click the new folder button |
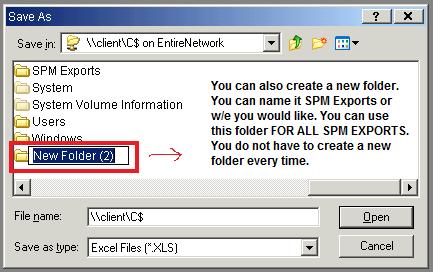 |
Step 6 After clicking the new folder button in the last step we need to create a new folder name. You can name it anything of your choice, but I used SPM Exports. This folder is where you will save all of your SPM Exports. IMPORTANT (You do not have to create a new folder every time, you can use this same folder) |
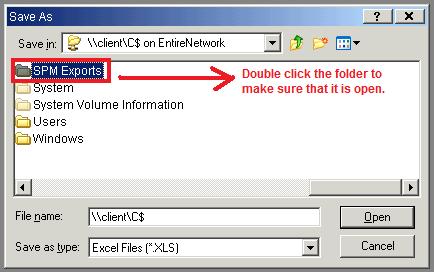 |
Step 7 |
 |
Step 8 We must change the file name from \\client\C$ to the name of the SPM Export. If you click save with \\client\C$ it will take you back to the directory that you saw in Step 4. We do not want that. So lets rename it to what ever file name you would like. I suggest using daysheet with the dates of that report for future refrence. Something like daysheet_12-10-09_12-17-09 or you can just name it what ever you would like. |
 |
Step 9 Once you have re-nammed the SPM Export to your choice, we now need to save the file. Press Save. |
 |
Step 10 Now that you have pressed save a new box will appear that says Save as Excel. It will have a gray loading bar. Once this finishes, the file has been saved. |
You are now done with the SPM Export Tutorial.
Go Back
Thank You,
United Medical, LLC